Grain and Sugar Free Blueberry Muffin Recipe

Hello! I am so thrilled to help fill in for Ashley as she takes care of her new baby girl! I remember how wonderful (and sleep deprived) those first moments were … so I am wishing her the best as she recovers and enjoys all of those baby cuddles.

My name is Laury, and I started a blog in 2009 called The Fitness Dish. After the birth of my second child I took a few years off from blogging to focus on my family and my business … but now I am back! My blog has a new name and a new look, and I am so excited to be connecting with this community again!

I am a power yoga instructor, sports nutritionist, personal trainer, and mom who teaches people how to create healthier habits in all areas of wellness. On my blog, you will find recipes for low-sugar meals, DIY beauty & skincare, wellness tips, as well as some yoga & fitness sprinkled in.  It is basically all of my passions poured into one place.

Ashley said you guys needed more breakfast ideas, so I am going to share one of my FAVORITE freezer-friendly muffin recipes with you today.

I created this a few years ago for my son when he was doing baby-led weaning, and I was nursing (and ravenous).

Many of my friends and family make this still today, and love it!

These muffins have NO added sugar, so they are best enjoyed warm, topped with some grass-fed butter, ghee, or coconut oil on top.

You can certainly add some Grade-B maple syrup (I would suggest about 1/4 cup) of you think you or those you’re serving it to would love a tad more sweetness.

If you are doing a program like The Whole 30, these are compliant (just use coconut oil instead of butter).

Adding more healthy fats in place of the added sugar for flavor was key for me in reducing overall sugar in my diet. It is satiating and keeps my belly full and taste buds happy!

I am lucky to have a flexible job, working from home and teaching yoga at the studio several hours per week.

However, there is a lot of running around and chaos that happens daily.

Mornings are full with work outside the home, afternoons I am with my 3-year-old son and 75-pound high-energy puppy (all while trying to sneak in computer work for my home-business during nap-time if it happens).

Once my husband is home from the office I am usually running off to teach yoga classes.

A flexible job where you can be home a few hours during the day has its perks, for which I am grateful, but it also presents its own set of challenges.

Having food prepped for easy grab and go is crucial for us to stay on our healthy eating game.

Picking one day to make a bunch of things ahead for breakfast and lunches (as well as planning my dinner menu) has been super helpful.

These grain and sugar-free blueberry muffins have been a staple in that rotation!


GRAIN-FREE BLUEBERRY MUFFIN RECIPE

makes 12 muffins

ingredients:

  • 1-2 ripe plantains (2 cups, pureed)
  • 1/4 cup coconut flour
  • 1/4 cup coconut milk (I like this brand: guar gum and BPA-free; you can also use raw grass-fed whole milk)
  • 3 TBSP coconut oil, melted
  • 5 eggs (pastured and soy-free a plus!)
  • 1 cup frozen organic blueberries, divided
  • 1 teaspoon baking soda
  • 1 teaspoon baking powder
  • 2 teaspoons vanilla
  • 1/4 teaspoon salt
  • 1/4 teaspoon of cinnamon

directions:

Preheat oven to 350 degrees. Cut the plantains skin lengthwise with a sharp knife to remove the peel (make sure they are ripe, or they will be very hard and a regular blender won’t handle them). Puree plantain in blender or food processor. Meanwhile, sift dry ingredients in a bowl (you can just add them to a bowl and whisk them together). Add half of the blueberries and milk to the blender and quickly blend. Add melted coconut oil and vanilla to a bowl with a hand mixer or stand mixer and start mixing. Add plantain/blueberry mixture and scrape down sides until just combined. Alternate dry ingredients and eggs and make sure it is combining, but try not to over-mix. Add remaining blueberries hand stir in. Pour batter into parchment muffins liners in muffin tins. Bake for about 25 minutes.

Enjoy!

Please let us know if you try them.

If you have the time and want to pop over to my blog to say hi … I’d love to “meet” you!

Thanks for reading!

XO

Share Button
Follow:

Baby Diamond–Week 39


Ashley 6.18.17
Happy Tuesday! It is hard to believe that this is most likely the last pregnancy recap I will write since I’m currently 40 weeks and 1 day pregnant. This journey has been incredible and unlike anything I could have ever expected. I have so many thoughts regarding my pregnancy experience, but I am going to wait and share all my thoughts after Baby Girl Diamond has arrived. I am so thankful that overall it has been a very healthy pregnancy with only a few hiccups of excitement along the way. While I know that the average first child comes at 41 weeks and 1 day, I have a feeling that Baby Girl Diamond will come a little bit before that. In fact, Bo and I both keep saying that we think this Wednesday would be a great option! I kicked off the day with what is most likely my last Orangetheory Fitness class before Baby Girl arrives and am now staying busy by finishing a few more final work projects, blogging, cleaning, and going through my hospital bag one last time.

Let’s dive into the latest and greatest details of this pregnancy, focused on how I felt last week, June 11th through June 17th during Week 39 of pregnancy.

Baby Size: As of Week 39 Baby Girl has plumped up and is around 7.5 pounds and over 20 inches long. Her brain is still developing each day and she can flex her limbs already! She was extremely active all week, especially during the afternoon and loved moving from one side to the other side, never settling in the middle.

Weight Gained: As of last week’s 39 week doctor appointment, I have gained 33 pounds, some of which could be water weight due to the extreme Summer heat.

Symptoms:  Last week, I started to feel discomfort on a more consistent basis. Sitting in chairs grew so uncomfrotable that I finally borrowed a neighborhood mom’s stability/exercise ball to use during the day and in the evening. Sitting on the ball provided immediate pelvic and rib cage/upper back relief, where I was feeling the most pain. Towards the end of the week, I started to feel some pretty severe Braxton Hicks in my upper abdominable region, but no true contractions yet. I took lots of warm showers and enjoyed another prenatal massage to relieve some of the tension and pain. During both my doctor’s visits last week my blood pressure was in the healthy range as were all my other lab results.

Workouts: My doctor continues to reinforce the benefits of staying active, as long as the activities are workouts that I’ve done throughout pregnancy and are indoors with sufficient air conditioner and fans. Based on this, last week I swam once, did one prenatal yoga class, two prenatal pilates class at Aline Pilates and two Orangetheory workouts. Based on how I was feeling, I actually hopped back on the treadmill as incline walking, at a slower pace, felt better than bike this week. Swimming was harder cardio-wise but still felt amazing. I kept my pace slower and shortened my workout to 30-minutes and then spent 15 minutes doing some gentle exercises in the pool as well as pool walking/jogging. My doctor attributed the increased difficulty to the baby’s position and pressure on my ribs and lung area.

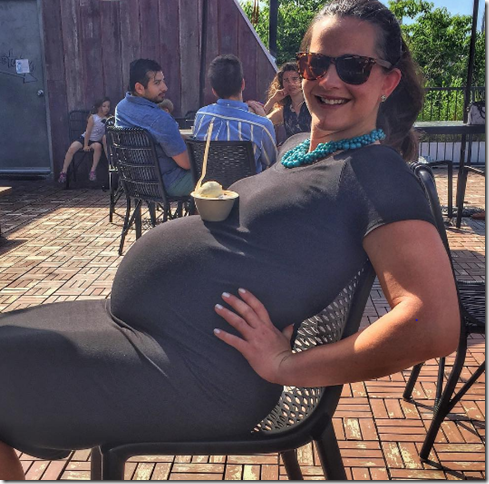
Cravings: As soon as the hot weather went away, so did my ice cream craving. Last week I found myself eating more normally, having yogurt bowls for breakfast most days, salads or sandwiches for lunch and enjoying dinner since my stomach had a bit more room due to the baby dropping. Bo and I actually went out three nights in a row, which is very unusual for us. We decided it was time to enjoy some last-minute date nights since we didn’t know how soon Baby Girl Diamond would arrive. It was so fun to just laugh and chat with him over a few casual meals including Mexican and burgers. It wasn’t until yesterday, when the heat returned, that I craved ice cream and fresh fruit ALL day!

Food Aversions: After drinking La Croix throughout my entire pregnancy, I started to crave infused tap water last week versus sparkling water. I made lemon water and lime water most days, trying to ensure I stayed well-hydrated.

Sleep: Last week continued to be tough as I couldn’t get comfortable. In fact, only one night did I sleep “well” while the other nights I found myself tossing and turning, waking up multiple times not only to use the bathroom but just to move into a more comfortable position. I continued to experiment with different pillow configurations each night, one night using all our guest bedroom pillows and our pillows to find support and relief.

Wearing: Last week I think I wore and washed my black dress five days though I tried to keep things fun by changing my accesories. Otherwise, I rotated through the same clothes and shoes as last week.

Other Random Thoughts, i.e work and blogging after baby: Last week marked my last full work-week before maternity leave. While I love my company and my role, I am looking forward to investing 4.5 months with our new bundle of joy. My company, Procter & Gamble, provides 16 weeks of paid leave while employees have the opportunity to take longer, unpaid. At this point, my plan is to return to work on November 1st, which will be about 4.5 months after Baby Girl Diamond arrives. While things are a work in progress, I will most likely still work from home most of the time. We are still working through options in regards to child care but our goal is to do a nanny share with one of the many couples we know who have either just had a child or are expecting in the next few weeks.  In regards to blogging, my plan is to continue blogging while I’m on maternity leave though the frequency will be based on how much time I have. My number one priority will of course be our growing family but I look forward to sharing so much with you all.

Want more frequent updates? Be sure to follow me on Instagram and Insta Stories for daily updates!

Share Button
Follow:

Easy Buffalo Chicken Meatballs

As promised friends, I have a some wonderful guest posts lined up for you guys while Bo and I are focused on Baby Girl Diamond. Since you guys have asked for more recipes, these posts are all easy, healthy, delicious recipes that you can recreate at home! Today’s first guest post is from a Katie, a friend and fellow blogger who, until last month, lived just down the block from me in Brooklyn. 

Hi My Healthy, Happier Life readers!  My name is Katie. I am a 27-year-old New York native who recently moved to the Philly area. Since 2012 I’ve been sharing my love of running, exercise, healthy living and, of course, food on my blog, Hungry Runner. I am a marathoner and former personal trainer and on Hungry Runner my goal is to help others find the fun in exercise and happiness in living healthy. And for my fellow runners, I also to love share my training strategies, injury-prevention tips, nutrition advice and everything else I learn about running through this crazy, fun journey! 

Compared to our old apartment in Brooklyn, Mark and I have probably like 6 times the amount of counter space in our new apartment’s kitchen.

I’m not exaggerating either. In the Brooklyn apartment, we had lots of space in our kitchen, but the countertop was monopolized by the stove and the sink. Between those two things we had a tiny little space where the coffee pot and soda stream sat and that was it. Food prep was confined to the kitchen table, which wasn’t the worst thing, but it also wasn’t ideal.

Now we have counter space on either side of our stove and a ginormous island.

It’s glorious.

Easy Buffalo Chicken Meatballs

One of the reason it’s glorious is because compared to when we lived in Brooklyn, I’m now way more excited to cook and try new recipes more often. In fact, I have a goal to try at least one new recipe every week.

These buffalo chicken meatballs are the first result of that goal.

I found the recipe on Pinterest (groundbreaking, I know) and it’s by Natalie from lifemadesimplebakes.com.

One of the reasons decided on buffalo chicken meatballs was because we already had most of the ingredients needed to make them. That’s always a plus. Another reason is because the title of the recipe on Natalie’s page includes the words “30 minutes.” If there’s one thing you all should know about me it’s that I like food that’s ready fast.

Even if Bobby Flay custom designed the world’s number one, most fabulous kitchen for me, I’m not spending more than an hour (and that would be pushing it) there preparing a meal. It’s just not happening.

In other words, this recipe is nice and easy to work with, and that’s the way I like it!

Mark and I ended up modifying it a little bit and in the end we were certainly satisfied with the end result. So without further ado, here’s what you need to know to make your own buffalo chicken meatballs.

Easy Buffalo Chicken Meatballs

Easy Buffalo Chicken Meatballs

Ingredients:

  • 1 lb. ground chicken
  • 1/3 cup panko breadcrumbs
  • 1 egg, lightly beaten
  • 1 small carrot, finley grated (I used 3-4 small baby carrots)
  • 1 small stick celery, minced
  • 2 green onions, minced
  • 2 cloves garlic, minced
  • 1/2 tsp. paprika
  • 1/2 tsp. sea salt
  • 1/4 tsp. ground black pepper
  • Buffalo sauce
  • Blue Cheese or Ranch Dressing

Directions:

1. Preheat your oven to 400 degrees. Set a side a baking sheet lined with parchment paper or a baking mat. (I used a baking pan sprayed with coconut oil and that worked fine, the meatballs just left a little bit of residue behind, but it came off with soap right away.)

2. Add the ground chicken, panko breadcrumbs and egg to a large bowl. Let the breadcrumbs soak in the egg for a few minutes, then add the carrot, celery, green onion, garlic, paprika, salt and pepper. Mix everything together using your hands or a spatula until combined

3. Using a spoon, shape one meatball at a time and then place on the baking sheet. (We made larger, more standard-sized meatballs that we served over salad with quinoa, but you can make them any size you like. These would definitely make a great appetizer as smaller sized meatballs!)

4. Place the meatballs in the oven and bake for 15-20 minutes, or until cooked throughout.

5. When they’re finished cooking, remove the meatballs from the oven and place them in a bowl. Add buffalo sauce (about 1/3 cup, or more if you really like buffalo sauce!) and toss to coat.

6. Serve with blue cheese, ranch or your favorite dressing.


Share Button
Follow:
Share:
Comments Off on Easy Buffalo Chicken Meatballs